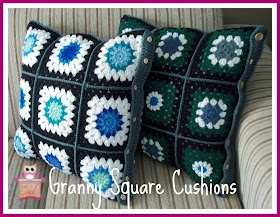
Hooray!
The Granny Square Cushion Covers are finished!! Officially crossing this off my PHD list!
Here is how I made them:
18 x 7 row Granny Squares per cushion = 9 for the front and 9 for the back
Join the squares together in 3 x 3 rows
You can use whatever joining method you prefer.
I joined mine by putting two squares on top of each other (right sides facing outward) and crocheting 1 sc through both squares simultaneously into the top "v" of each dc (ouch that was a mouthful - not even sure I understand what I just said??)
Once the 3 x 3 squares were joined, I worked the buttonhole border onto what would be the back of the cushion cover (so the buttonhole border folds over onto the front - if you want to make it a bit of a feature as I did).
For the second cushion I did not make actual buttonholes as I only used small buttons which went quite nicely into the spaces between dc.
Buttonhole Border:
Row 1 - Join border colour, 3ch, 1dc between each dc on the squares (when you reach the join - 1dc into the cnr, 1ch over the join and then 1dc into the next corner)
Row 2 - 3ch, 1dc into each dc
Row 3 - 1ch, 1sc, 1hdc, 1dc into each dc to last three dc - 1sc, 1hdc, ss. Break off
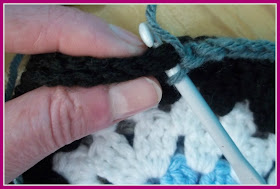
Fold the border down and then work a row of single crochet into the top of the fold - working your sc stitch to the left of the post - this forms a seam at the top of the buttonhole border and gives it a very neat fold. Break off the yarn once you have completed this seam.
Then join the back and front of the cushion (right sides facing outwards) by crocheting 1sc through both front and back into the top "v" of each dc
Oh my WORD! This post seriously hurt my head!! These cushions were super easy to make - NOT so super easy to try to explain it on paper!
I think I will make another one and do a photo tutorial from start to finish........


No comments:
Post a Comment