I used to love long floaty winter scarves (even better if they had super long full tassles)! Only problem with this type of scarf is the possibility of serious bodily injury - as they always seem to get caught on and in everything.
My new winter favourite is the Infinity Scarf (lovely and warm, fairly loose around the neck and so out of the way!
The Diagonal Granny Stripe is also a big favourite of mine - I just HAD to use it to make an infinity scarf:
Here is my pattern in case you would like to make one (I have tried to make it as accurate as possible - I am only human though - so please leave me a comment if you find an error)!
Start with: 5ch
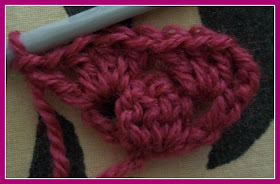
Row 1: Into 5th ch from hook - 3dc, 1ch, 1dc (first corner formed)
Begin Increasing:
Row 2: 4ch - turn; 3dc into 1ch sp; 3dc, 1ch, 1dc into corner space
Row 3: 4ch - turn; 3dc into 1ch sp, 3dc into space between clusters; 3dc, 1ch, 1dc into corner space
Repeat Row 3 13 times (16 rows in total)
In order to form a long rectangular strip you will now continue to increase on the one side of your work, while decreasing on the other:
Row 17: 4ch turn; 3dc into next sp between clusters (decrease = 2nd corner formed), 3dc into each subsequent sp, into last sp on row work 3dc, 1ch, 1dc (increase)
Row 18: 4ch turn; 3dc into 1ch sp (increase); 3dc into each subsequent sp up to 2nd last sp; 1ch, 1dc into last sp
Repeat rows 17 and 18 until you have a total of 130 rows
At this point you will continue to decrease on the one side as you have been doing and you will begin decreasing on the side where you were previously increasing:
Row 131: 4ch turn; 3dc into next sp between clusters (decrease), 3dc into each subsequent sp up to 2nd last sp; 1ch, 1dc into last sp (decrease - 3rd corner formed)
Repeat until second last row = 1sp, 1 cluster, 1 sp
Final Row: 4ch turn 1dc into sp at end of row.
Fasten off
Fold in half and join the bottom and top seams:
I gathered my seam slightly (I find it sits better at the back of the neck) - but this is up to you.
Yarn used: Stylecraft Life - Fuschia, Melon, Clover (four rows of each in that order)
Hook used: 5.00mm (my tension is a bit on the tight side though).
Fun to make - lovely to wear!


I love this color scheme. My niece would love it, she's 12 and she wears more of my crochet things than my 3 year old daughter does lol. May have to whip one up for her this Christmas.
ReplyDeleteThe tweens do seem to like the crochet goodies - this would make a great Christmas gift - she is lucky to have such a creative aunt!
DeleteVery nice scarf! Original too with the diagonal granny stripes!
ReplyDeleteThank you v much for sharing!those who might find errors are only human too :-) .Great work!
ReplyDeleteInfinity scarf is the best for winter season, and not only in winter season I think. Infinity scarf is for all season! ;) Your scarf is so lovely; I like the color – perfect color combination. Thank you for sharing this tutorial Zelna. :)
ReplyDeleteThank you so much I think I will give this a try
ReplyDeleteThis is lovely.Can you tell me the total weight to make this scarf.
ReplyDeleteI used 100g of DK (8ply) which is the US equivalent of Light Worsted Weight
DeleteI'm making an afghan with this pattern but I altered it slightly. I added a ch 1 between each 3 dc cluster. I have a photo of it on my blog:
ReplyDeletehttp://gingercraftblog.blogspot.com/2015/12/granny-c2c-afghan.html
How much yarn did you use to make this?
ReplyDeleteHi Sonya. Just under 100g of each colour - I would estimate about 260g in total.
DeleteI'm making an afghan to go on my lap as I'm a wheelchair user and this makes a lovely warm little blanket in bright colours as didn't want to look dowdy. What I don't know is when to start the 2nd lot od decreasing on the other side of my work? Any ideas or help much appreciated. thanks Zelna
ReplyDeleteHi Kim! Sorry I took so long to get back to you. December / January are just crazy months family-wise! Start the first set of decreases (on one side only) when the blanket is as wide as you want it to be. Start the second set of decreases (on the opposite side) when the blanket is as long as you want it to be - for a rectangular blanket. For a square blanket start the first and second set (side) decreases simultaneously. Hope this helps.
Delete