Zooty Owl's Crafty Blog

Colourful Crochet, Craft, Cooking, and Contemplations

Friday 27 September 2013

Yarn Indaba 2014 - Yarnbombing Fun

Yarn Indaba 2014 - Yarn Bomb World Record Attempt!

I am jumping in a little late with this post - by now Yarn Indaba is not new(s) - all and sundry have already picked up their crochet hooks and knitting needles and are frantically making blocks for the World Record attempt at the largest yarn bomb.


According to Wikipedia, the free encyclopedia


Yarn bombing, yarnbombing, yarn storming, guerrilla knitting, urban knitting or graffiti knitting is a type of graffiti or street art that employs colourful displays of knitted or crocheted yarn or fibre rather than paint or chalk.


yarn storming

The attempt at the World Record will be made on 1 August 2014 by covering the steps of the Voortrekker Monument in Pretoria, South Africa with crocheted / knitted blocks:

19050 blocks of 20cm x 20cm
3350 blocks of 15cm x 15cm 

Contributors efforts will be put to good use after the yarn bomb, as the blocks will be donated to charities for the making of blankets (lots and lots of lovely warm, wooly, comforting blankets!!)

I decided to "merge' the two scrap buster projects I had going to see how many squares I could make for Yarn Indaba!

Count so far:

24 - 20cm x 20cm blocks
2  - 15cm x 15cm blocks

An extremely colourful and mismatched collection of blocks - I could not resist the temptation to use  them for a little yarn bomb of my own:


yarn storm

I LOVE how colourful the tree looked!     I can just imagine how fantastic it must be to create a BIG yarn bomb!!

It took me about an hour to work them together roughly and then "stitch" them on to the tree (which is a lovely thirteen year old ficus - a housewarming gift from a very dear friend)     I had to take the photos in a big hurry so that I could disassemble it again - storm clouds blowing over and I was convinced we were going to get some much needed rain (my mistake - still no rain!)

The squares are once again neatly stacked and ready to play their part in the biggest Yarn Bomb ever!!!

Frantically finishing up some  more WIP's so that I can make more squares for Yarn Indaba!

Monday 9 September 2013

Banana Ripple and Lemon Sorbet

Scrapbooking  (next to crochet and cardmaking) is my absolute favourite thing to do!!  - the cutting, layering, pasting, embellishing - OOH love it!

I have never taken to the digital scrapbooking and cardmaking craze - but lately I have been having a lot of fun "scrapbooking" my craft photo's with Pic Monkey!


crochet baby blanket

This will never replace my "paper" scrapbooking  - but it is perfect for my online sharing!

We have not "eased" into spring here in Johannesburg - the days are already hot, and Mr Owl and I have been enjoying fruit salad and ice cream for lunch for the past few days.

Last week I was admiring the gorgeous colours of the fruit salad and banana ripple ice cream as I carried it out to the lapa (thatch gazebo thingy) - and lightbulb!!! - I just had to make a Banana Ripple Baby Blanket!!   I started the square "log-cabin style"  - about halfway through I switched to working the whole way around with each colour change.    It worked up quite quickly, and as I was crocheting I was already planning my next ice cream blankets - choc chip mint, berry ripple, chocolate and fudge..........


crochet baby blanket

I made this one a few weeks back and had no idea what to call it.     Ice cream inspiration......... I love those pretty sorbets that you get in the orange and lemon skins..... and YAY my blanket had a name.

My arm is still pretty useless at the moment (thank you eight legged creature!) - not capable of any major creative feats.      Baked a batch of  muffins using some Golden Cloud Vanilla Muffin baking mix - add 2.5ml of cinnamon and 1 grated apple to the mix - sprinkle cinnamon sugar on top before baking) - not quite made from scratch but still homemade and freshly baked!    And quite yum!!


cinnamon muffins

Played around on Pic Monkey again!!

Tried to make sense of my WIP's


seed stitch

Seed Stitch Baby Blanket - not much progress has been made here (only 32 rows so far).

Miss M's Groovyghan (well not actually a work in progress - but I have chosen the colours if that counts??) - a Christmas gift for my niece.

Stormy Seas Groovyghan (second one I am making in these colours - as I had quite a bit lof yarn left over from the first one)     Changed the layout and the flower squares a bit for this one.   Came up with a brilliant (I think so) flower square granny - will share soon!

Lacy Baby Blanket- been busy with this one since the beginning of time!   This is the second one I am making using this pattern - the first was a commissioned blankie.    I want to share the pattern for this one - and committing pattern to text is probably what is causing the hold up!

Cushion Covers - started out as a set of three but due to loss of interest in this project will now be a set of two!

Scrapbuster project - making 5 row, single colour granny squares from whatever scraps I have left from other projects.

Oh and then there is my Scrap-Scrapbuster project - another Hexagon Scrapghan - this one is going to be even busier than the first!

Wow!   I have been waffling on for ages - can you tell how bored I am not being able to Craft??

Think I will make some tea - and I have a ridiculous craving for a peanut butter and syrup sarmie!

Then I will sit and sip tea and hope that the Courier arrives with my wool order.     Sooo excited!!

Saturday 7 September 2013

Christmas Stocking!!!


Despite my recent "mis-adventure" I managed to get round to writing the pattern for my Christmas Stocking!

A nasty little something bit me on the upper arm while working in the garden.     It started out a bit itchy - so I just put a bit of antihistamine cream on.    A couple of hours later my arm was huge - hot - and a nasty red!    Mr Owl (my  hero - always to the rescue) spirits me away to the ER.  The Triage Nurse, the Casualties Nurse and the Doctor ask me "How Are You??"?   Really??   I am in the ER at 23h00 on a Friday night with the Grim Reaper peeking over my shoulder - how do you think I am??   Shot of Pethidine and two massive dosis of antibiotics later - and the Dr pronounces me fit to go home (at this point Grim shuffles off looking rather disgruntled!).

My arm is not very useful today so I have been blogging about and writing my  
CHRISTMAS STOCKING PATTERN:

Pattern Terms:   US

Yarn:  Mirage Pullskein (DK / 8ply / light worsted weight) - Stylecraft Special DK is a good alternative and is available internationally online from Deramores.

Hook:  5.50 for the boot and a 5.00mm for the joining (the Mirage DK is slightly thicker than other DK yarns).   Adjust your hook according to your yarn thickness.

Size:  Stocking measures 35cm in height.    Heel to toe 25cm.

Make SIX circles as follows:

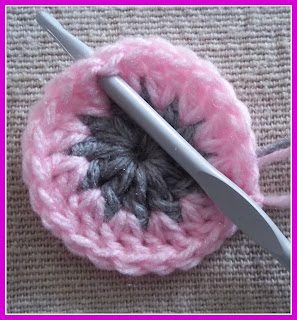
Ch 4, ss to join
Row 1:  3ch, 11 dc, ss to join
Row 2:  3ch 1dc into sp between dc; *2dc into sp between dc* rep *to* 11 times = 24dc
Row 3:  3ch, 1dc into sp between 2dc, 1dc into next sp *2dc into next sp between 2dc, 1dc into next sp*Rep *to* 11 times = 36 stitches


crochet christmas stocking

For the TOP CUFF take TWO of the circles and crochet a fourth row on each as follows:

Row 4:  Into a sp between a double dc work as follows:
4ch, 1tr, 2ch, 2tr; *1dc into each of the next 8sp; 2tr, 2ch, 2tr into next sp* rep *to* 3x; 1dc into each of the next 8sp, ss into top of 4ch


crochet christmas stocking

HEEL PIECE A
Into a sp between a double dc work as follows:  4ch, 1tr, 2ch, 2tr; 1dc into each of the next 8sp; 2tr, 2ch, 2tr into next space;  1dc into each of next 5 spaces - start forming the heel piece by crocheting 2dc into each of next 5 spaces;   1dc into each of next 7 spaces;   2tr, 2ch, 2tr into next space;  1dc into each of next 8 spaces, ss into top of 4 ch to join

HEEL PIECE B
Into a sp between a double dc work as follows:4ch, 1tr, 2ch, 2tr; 1dc into each of the next 8sp; 2tr, 2ch, 2tr into next space;  1dc into each of next 8 spaces;   2tr, 2ch, 2tr into next space;  1dc into each of next 7 spaces;  2dc into each of next 5 spaces;   1 dc into each of next 5 spaces


crochet christmas stocking

TOE PIECE A
Into a sp between a double dc work as follows:4ch, 1tr, 2ch, 2tr; 1dc into each of the next 8sp;  2tr, 2ch, 2tr into next space;  1dc into each of next 8 spaces;  *2dc into each of next 8 spaces, 1dc into each of remaining 10 spaces;   ss into top of 4 ch

TOE PIECE B
Into a sp between a double dc work as follows:4ch, 1tr, 2ch, 2tr; 1dc into each of the next 8sp;  2tr, 2ch, 2tr into next space;  1dc into each of next 10 spaces;  2dc into each of next 8 spaces, 1dc into each of remaining 8 spaces;  ss into top 4ch


crochet christmas stocking

Join A & B   Cuff, heel piece A, toe piece A

I crocheted mine together at the back - 4ch through both corners of toe and heel pieces, skip 2dc, 2ch,  1sc into next space - repeat to corner, 1ch, crocheting 1sc through both corners of heel and cuff pieces, skip 2dc, 1sc into next space - repeat to corner.

Crochet a row of dc around A and around B 

To extend the Cuff:
Join 3rd colour to the top corner - 3ch, 2dc into corner, skip 3dc, 3dc into next space - repeat to opposite corner, 3dc into corner, 3ch turn

3dc into next space, repeat to last space, 1dc into top of 3ch of previous row.

Repeat these two rows until the stocking is as long as you like (I did 6 rows), changing colours as you like.


crochet christmas stocking

Now to bring it all together:
Into top of 3ch on the last cuff row on A work 1ch, 1sc into the top of each dc - repeat to last stitch
20ch, ss into each chain
Fold over and ss into first chain to form the hanging loop 

Hold A & B together (right sides facing outwards) 2sc into side of each post on cuff, 1sc through both A & B into each space between dc, 2sc into side of each post on cuff, 1sc into top of each dc on side B, ss into bottom of hanging loop to finish.

Weave in the ends and Decorate!!


crochet christmas stocking

Tuesday 3 September 2013

Emergency Baking


Today was another one of those CRAZY busy days.    Hubby has been on the phone with clients all morning and I have been packing cards.      By the time I realised I was starving and was about to make us breakfast it was almost lunchtime!    I felt like something freshly baked and savoury.    I usually make my sweetcorn bread from scratch - but being a bit pressed for time today I took a shortcut (all the while holding thumbs that it would actually turn out ok!!)

I keep a packet or two of these premixes in the cupboard for emergencies (almost starved + lazy + in a huge hurry = EMERGENCY):


I added  oil and eggs as per the packet instructions, a 410g tin of sweetcorn and about 150ml water.  Shared in half between two greased loaf pans.    Baked at 180C for about 45 minutes:


They turned out quite well.     Had to take a quick pic because Hubby had arrived to investigate the aroma!    Grated some cheese, put out some butter and apricot jam, made two quick cups (coffee for Hubby - tea for me) and LUNCH!


Slices are a bit hacked - the bread was still steaming hot - but, as I said, we were starving!     OOOH yummmeee!    It was delish!

Spending the afternoon working in ends and trying to figure out why I suddenly cannot connect to the internet on my laptop??

Hopefully I will still have some time to work on my Christmas Stocking pattern.

Saturday 31 August 2013

Circle in a Square Granny Motif - Solid Variation Pattern

For a more solid variation of  the Circle in a Square granny Motif  Pattern perfect for cushion covers, work as follows:

Ch 4, ss to join

Row 1:  3 ch (counts as 1 dc), 11 dc into circle (12 dc), ss into top of 3ch to join

Row 2:  3ch, 1dc into sp between dc;  *2dc into sp between dc* rep *to* 11 times= 24dc

Row 3: 
3ch. 1dc into sp between 2dc, 1dc into next sp*2dc into next sp between 2dc, 1dc into next sp*Rep *to* 11 times = 36dc

Then crochet rows 4 to 6 as follows:

Row 4:
Into a sp between a double dc work as follows:
4ch, 1tr, 2ch, 2tr; *1dc into each of the next 8sp; 2tr, 2ch, 2tr into next sp* rep *to* 3x; 1dc into each of the next 8sp, ss into top of 4ch


circle in a square granny motif
Rows 1 - 4 of the Circle in a Square Granny Motif


circle in a square granny motif
Rows 1 - 4 of the Circle in a Square Granny Motif

Row 5:
ss into first sp; *3ch 1dc, 2ch, 2dc into corner sp, *1dc into each of next 11sp, 2dc 2ch 2dc into cnr sp* rep *to*  1dc into each of next 10 sp, ss into top of 3ch

Row 6:
ss into first sp; 1dc into next sp *3ch 1dc, 2ch, 2dc into corner sp, *1dc into each of next 14sp, 2dc 2ch 2dc into cnr sp* rep *to*  1dc into each of next 10 sp, ss into top of 3ch 

Thursday 29 August 2013

Granny Squares, Christmas Stocking (and other happy tales!!)

Joy! Joy! Joy!

A couple of reasons for my overwhelming sense of happiness today:

Finished the Queen Sized Log Cabin Granny Square Afghan commissioned by a client!!!     Delivered and client DELIGHTED = me HAPPY!!


Log Cabin Afghan

Finished the Granny Square Afghan for my shop (inspired by the Spanish Lavender in my garden)


Granny Squares Afghan

Little pops of colour showing up here and there in the Garden!

Yellows.....


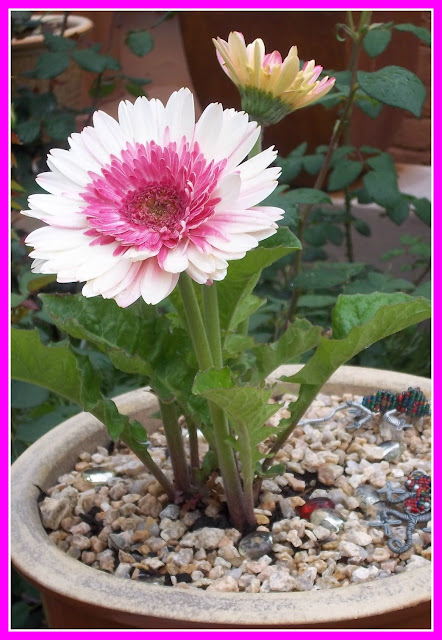
Gerbera

and pinks!


Gerbera

Barberton Daisies (Gerbera's) one of my favourite flowers - I have them planted all over the garden in a multitude of colours.  The "landscape" variety make for fantastic cut flowers!!

And......

my latest crafty make - A Christmas Stocking!!


Christmas Stocking

This is just the prototype made yesterday morning while contemplating whether I should or shouldn't make the effort to do the grocery shopping - a task which I look forward to about as much as I would look forward to major surgery!   Anyway - common sense eventually won out and I did the shopping!    Phew!   over and done with for at least 10 days!

Thanks to this little stocking, however,  I left home at least three hours later than I had originally intended.     I say thanks because had I left at my usual grocery shopping time I would have been caught in the middle of a gunfight (12 armed robbers with AK47's) - really nasty!   Reminded once again to be thankful and happy in every little moment!

My Prototype has a few minor defects which I need to address - and then I shall attempt to share the pattern with you!!! 

Monday 26 August 2013

Granny Square Cushion Covers

Hooray!

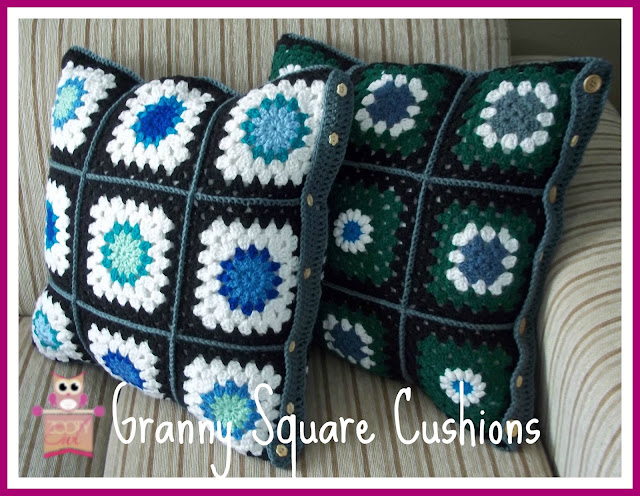
The Granny Square Cushion Covers are finished!!   Officially crossing this off my PHD list!


granny square cushions

Here is how I made them:

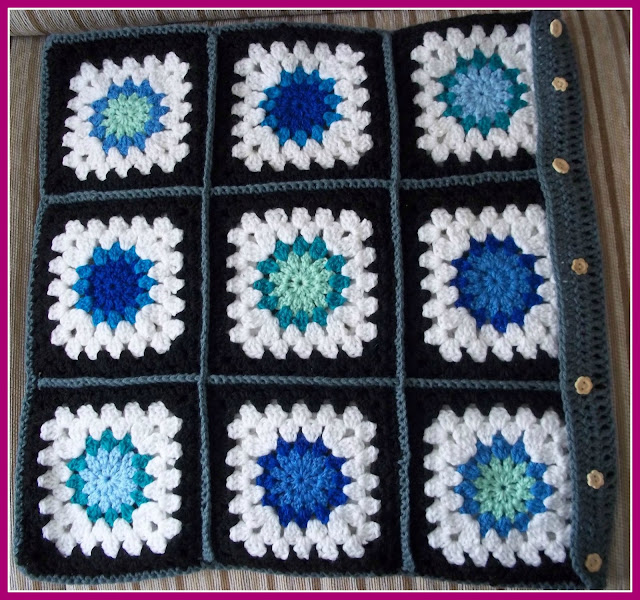
18 x 7 row Granny Squares per cushion = 9 for the front and 9 for the back

Join the squares together in 3 x 3 rows
You can use whatever joining method you prefer.

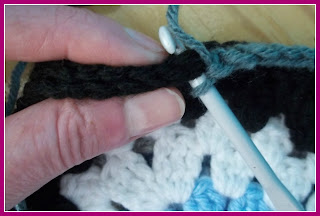
I joined mine by putting two squares on top of each other (right sides facing outward) and crocheting 1 sc through both squares simultaneously into the top "v" of each dc (ouch that was a mouthful - not even sure I understand what I just said??)

Granny Square Cushion Covers

Once the 3 x 3 squares were joined, I worked the buttonhole border onto what would be the back of the cushion cover (so the buttonhole border folds over onto the front - if you want to make it a bit of a feature as I did).

For the second cushion I did not make actual buttonholes as I only used small buttons which went quite nicely into the spaces between dc.

Buttonhole Border: 

Row 1 - Join border colour, 3ch, 1dc between each dc on the squares (when you reach the join - 1dc into the cnr, 1ch over the join and then 1dc into the next corner)

Row 2 - 3ch, 1dc into each dc

Row 3 - 1ch, 1sc, 1hdc, 1dc into each dc to last three dc - 1sc, 1hdc, ss.   Break off
Fold the border down and then work a row of single crochet into the top of the fold - working your sc stitch to the left of the post - this forms a seam at the top of the buttonhole border and gives it a very neat fold.   Break off the yarn once you have completed this seam.

Then join the back and front of the cushion (right sides facing outwards) by crocheting 1sc through both front and back into the top "v" of each dc
 
Granny Square Cushion Covers

Oh my WORD!    This post seriously hurt my head!!      These cushions were super easy to make - NOT so super easy to try to explain it on paper!

I think I will make another one and do a photo tutorial from start to finish........

Saturday 24 August 2013

Daisy Granny Squares Baby Blanket

Today started out all lovely and overcast here in Johannesburg!   The air is so dry and dusty - a couple of days of rain is just what we need - but the rain seems to have blown over and the sun is shining in all its South African winter glory!

Hubby and I ate brunch out in the lapa - toasted bacon, egg, cheese, tomato and fried onion sandwiches - yum!  (very unhealthy - I know! - but still soo yum!).    It's still a bit cool out by my standards - had to run inside and fetch my poncho (old and very much loved).    I should have taken some photos but I forgot my camera inside - and was just far to lazy to go back inside AGAIN and fetch it!
 
During this week I finally got around to using all the extra DAISY GRANNY SQUARES blogged about way back in June:


granny square afghan

Friday 23 August 2013

Infinity Scarf - Diagonal Granny Stripe

I used to love long floaty winter scarves (even better if they had super long full tassles)!   Only problem with this type of scarf is the possibility of serious bodily injury - as they always seem to get caught on and in everything.

My new winter favourite is the Infinity Scarf (lovely and warm, fairly loose around the neck and so out of the way!   

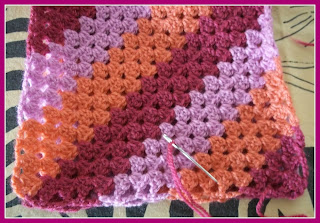
The Diagonal Granny Stripe is also a big favourite of mine - I just HAD to use it to make an infinity scarf:


Diagonal Stripe Infinity Scarf

Here is my pattern in case you would like to make one (I have tried to make it as accurate as possible - I am only human though - so please leave me a comment if you find an error)!

Start with:  5ch
Row 1:  Into 5th ch from hook - 3dc, 1ch, 1dc (first corner formed)

Begin Increasing:
Row 2:  4ch -  turn; 3dc into 1ch sp; 3dc, 1ch, 1dc into corner space


Diagonal Stripe Infinity Scarf

Row 3:  4ch - turn;   3dc into 1ch sp, 3dc into space between clusters; 3dc, 1ch, 1dc into corner space


Diagonal Stripe Infinity Scarf

Repeat Row 3 13 times (16 rows in total)

In order to form a long rectangular strip you will now continue to increase on the one side of your work, while decreasing on the other:

Row 17:  4ch turn; 3dc into next sp between clusters (decrease = 2nd corner formed), 3dc into each subsequent sp, into last sp on row work 3dc, 1ch, 1dc (increase)


Diagonal Stripe Infinity Scarf

Row 18:  4ch  turn; 3dc into 1ch sp (increase); 3dc into each subsequent sp up to 2nd last sp; 1ch, 1dc into last sp

Repeat rows 17 and 18 until you have a total of 130 rows

At this point you will continue to decrease on the one side as you have been doing and you will begin decreasing on the side where you were previously increasing:

Row 131:   4ch turn; 3dc into next sp between clusters (decrease), 3dc into each subsequent sp up to 2nd last sp; 1ch, 1dc into last sp (decrease - 3rd corner formed)

Repeat until second last row = 1sp, 1 cluster, 1 sp

Final Row:  4ch turn 1dc into sp at end of row.

Fasten off

Fold in half and join the bottom and top seams:


Diagonal Stripe Infinity Scarf

I gathered my seam slightly (I find it sits better at the back of the neck) - but this is up to you.

Yarn used:    Stylecraft Life - Fuschia, Melon, Clover (four rows of each in that order)

Hook used:   5.00mm (my tension is a bit on the tight side though).

Fun to make - lovely to wear!

Thursday 22 August 2013

Facelift Surgery

My Blog is undergoing facelift surgery.    May be a bit lumpy and puffy for a few days before it will be its new gorgeous self!

Wednesday 14 August 2013

WIP's on Wednesday # 7

Cannot believe that another week has already flown by and we are already midway through August - winter almost over - signs of  spring appearing here and there in the garden!!

I am not a big fan of winter - even though we have very mild winters here in Johannesburg, the air is very dry and of course that means really dry skin and plenty of static.   Shocked myself on the ear getting out of my car this morning (sounds silly right?) -  had to park particularly close to a wall and couldn't open the door properly - so as I was squeezing myself out my ear touched on the frame and SHOCK - pulled my head back so quickly I think I might have whiplash!

I was out and about for most of the day - only getting home at about 16h00 by which time the sun was already casting long dreary shadows.    Not a good time to take photo's, but I was determined to do this post TODAY!

Works in Progress this Wednesday:


Baby Blankets

Baby Blanket in pinks, red and white
Baby Blanket in lemon, apricot and white
Black, Pink and White Flower Afghan

And....

Just when I was about to do the dance of joy because I had used up all my scraps on the GRANNY SQUARES HAPPYGHAN- my daughter bestowed a basketful of her scraps upon me.    Using these to make another blanket for my cat - trying out a new joining technique, and a (mainly) black and white lapghan.

Sitting so snugly under my Happyghan I might just nod off!    Better get up and go brew a pot of tea!

Until next time.....

Tuesday 13 August 2013

Granny Squares Happyghan

Just wanted to show you how my happy scrapping turned out.    I have decided to call it the Granny Squares Happyghan!

My son remarked that it was "interesting" - in THAT tone of voice - inclined to agree with him - but it still makes me happy!

It has already had a wash and tumbledry - so it smells lovely and is all soft and fluffy.    I have given it a home on my favourite couch in my craftroom.     Got my feet up on my ottoman with my Happyghan over my legs, cup of hot chocolate next to me - blogging away!     Yep - I AM HAPPY!!!


granny square afghan


granny square afghan

Finished up with a lot of projects and busy doing the patterns which I will post for you soon!

Have a super evening!!!

Hexagon Motif Pattern - Scrapbuster Hexagon Afghan

This Hexagon Motif Pattern is perfect for using up teeny tiny scraps - and the best part is that you do not have to add a main colour if you are planning on making a scrapbuster afghan.

Start; Round 1; Round 2 - follow the instructions for HEXAGON CROCHET MOTIF # 2
using 2 different colours (A & B)


Round 3:  
Using Colour C insert hook as shown into space between 2dc
3ch, 2dc;   *3dc into sp between 2dc* 11 times
ss to join (12 3dc clusters)


Hexagon Crochet Motif

Round 4:
Continue with colour C
3ch, 1dc, 1ch into sp between 3dc
*2dc, 3ch, 2dc, 1ch into next sp;  2dc 1ch into following sp* repeat * to * 5 times
2dc, 3ch, 2dc, 1ch into last sp; ss to join


Hexagon Crochet Motif


Use the join-as-you-go method described HERE to join your motifs


Hexagon Crochet Motif

Once you start joining the hexagons you will be able to see a "line" try to keep to this line as you add on - it just makes it easier to keep form while you are making the blanket bigger.

I finished mine off with two rows of 2dc clusters following the shape of the hexagon


Hexagon Afghan

Friday 9 August 2013

Inspiration!

Happy Friday!

Wonderful Wonderful Rain through the night!     Everything was so fresh and new this morning!!     Really looking forward to the summer now!

Missed my Wednesday post (again) - been busy with some "right-brain" work this week

Lately I have been suffering from a serious case of wool-envy (reading through my favourite UK blogs) - the ladies are using the loveliest pure wool and wool / acrylic blends.    Anyhow, you know how sometimes when the non crafty side of your brain is being exercised, strange things pop into your head?  I remembered a little habby I used to drive past on my way home from work a few years back.    Looked up their number - hooray they are still in business (have been there for longer than 25 years apparently!) -  the shop assistant was extremely helpful - they stock imported wool from Spain, Turkey, Portugal and England - and what fortuitous circumstance! - they are having a SALE!    I mentioned to hubby that I was going to take a drive there and maybe buy a skein or two - "no" says hubby "go and SPLURGE" - well who am I to argue with such wisdom?!    The SALE had been on for two weeks already so they were quite low on stock - I still managed to get quite a nice stash though!    The envy phase has passed - I am now in the reverence phase -  touching, feeling, admiring and pondering the perfect pattern (have to wait for this phase to pass before I actually hook a stitch!!)


I Found a few (really horrible) pictures of the afghan made for my sister's 40th (referred to it in my BLUE HUES afghan post).


Granny Square Afghan

I had just returned from a trip to the Victoria Falls (Zambia side) and was still feeling very "Zambian" and soo inspired by the vibrant colours, weaving and lovely beadwork as seen in this little collection of souvenirs picked up in Livingstone.


Zambian Colour Inspiration

I made one more "Zambian" afghan in reds, greens, browns and beiges but for some reason never took a photo of it before it went to its new home.  

Busy sorting my photos - think my next inspirational phase was coastal - will blog about this at some stage!

Family has requested home made pizza tonight - sweet chilli chicken, bacon and pineapple, and meaty - so I will be at the oven for quite a while ........

Hope you all have an Inspirational weekend!!

Sunday 4 August 2013

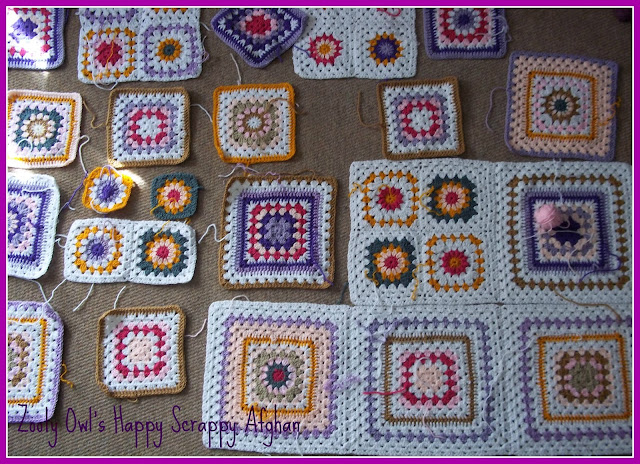
Happy Scrappiness!!

At the time of my previous post I was deliriously happy and filled with gratitude for my lovely life.    Still filled with gratitude for my lovely life - but feeling a little on the down side.....

Early last year my dad had a heart attack.   He subsequently had a few episodes but he seemed to be doing well - he was walking every day and he was in good spirits.   In recent weeks, however, his health has deteriorated rather rapidly.    Thursday was a really bad day for him - I was left feeling a bit helpless and uncharacteristically freaked out!

Completed the Pink/Purple Groovyghan on Wednesday evening - it just needed a border - tried to crochet  this on Thursday evening but ended up frogging it a few times - just couldn't get my head around it.   I had started working on a "Babette" afghan on Thursday morning but ended up frogging that too.      The result of this was a pile of silly squares and a lot of yarn that couldn't be reused for to-be-sold work.   

Decided Friday morning to put everything aside and indulge in a bit of silliness.  Started playing around with a photo editor (Pic Monkey) - so easy and so much fun.    Have been promising myself to pay more attention to my blog - i.e.post more often and make it more Zooty.   

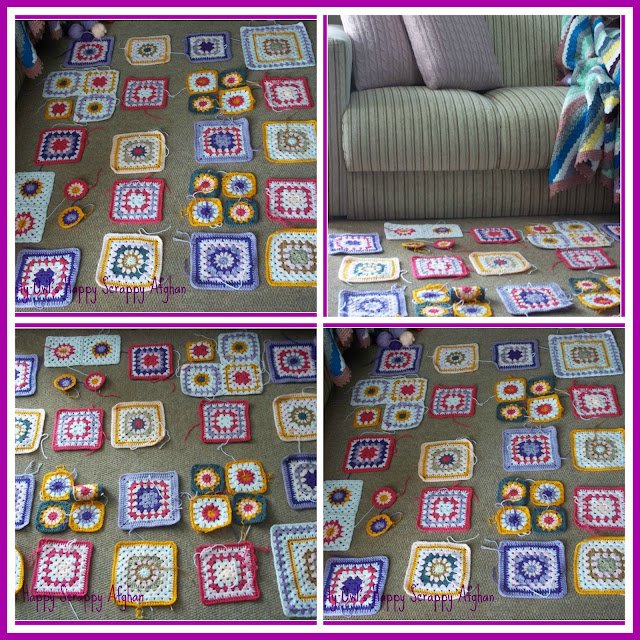
Laid out the silly squares and "froggy" yarn for a bit of photo fun!


Granny Squares Scrap Afgan
Happy Scrappy Squares


Granny Squares Scrap Afghan

This colourful collage made me think of a tablecloth we had painted when the children were little.    We used to love painting together.     I would take a big piece of calico, divide it into four sections and draw something (the same or a similar design) on each section.    Then we would each get a section to paint.     We would decide together what colours to use!    What fun - and a fabulous way to spend quality time together.


Fabric Painting

Photographing the tablecloth gave me a bit of inspiration for the squares.    There was way too much cerise - so I did a bit more frogging!!

Had some tea and a cappuccino muffin (baked by my son!).    By then it had warmed up a bit and I ventured out of my craft room to take more photos:


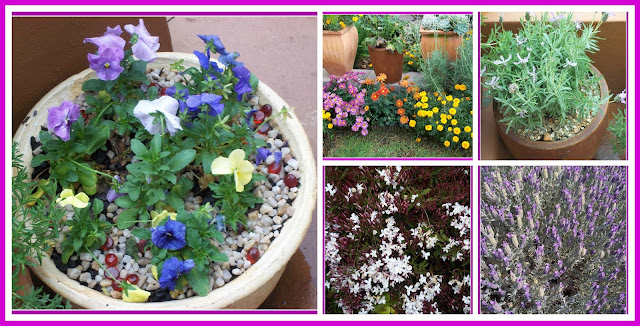
Flower Collage
A Bit of  late winter (early spring??) colour


The Star Jasmine looks (and smells) amazing - covered in millions of those little purplish pink buds.     Quite a lot have already started to open:


Star Jasmine
Star Jasmine
In spite of the cold my Spanish Lavender is also a mass of frilly purple flowers - abuzz with bees!


Spanish Lavender
Spanish Lavender

Spent the rest of the day beautifying old photos and reading other crafty blogs - crocheting in between!

By early this morning my Happy Scrappy Afghan was starting to take shape:


Granny Squares Scrap Afghan

You can see from this photo that quite a lot of the original cerise has been removed.    Tweaking it as I go along - so far definitely a "happy scrappy"!

My daughter just sent me a picture of her Groovyghan on Whatsapp - also nearly finished (showing you a sneak peek - will get some proper photos once it is complete):


groovyghan
Danielle's Groovyghan

Phoned my mom and she says my dad is a bit better today - so I am ending the weekend on a calmer note!

Hope you have a happy week with plenty of time to craft!!