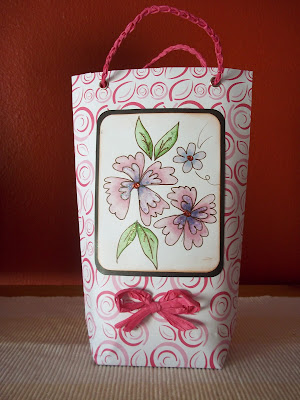
I love sharing my crafty makes with friends and family. One thing that always alarms me is how afraid they are to try it out for themselves. They always say "oh I'm not creative" or "you have to buy too many fancy things".
Yes, there is a fantastic range of products available to the dedicated crafter but waaaay back when (before all these things became extremely fashionable and commercial) we had paper, scissors, glue. a ruler and colouring pencils. If you have children you will most certainly have all of these items readily to hand.
I have wiped out most of my stash filling orders for Christmas - so my crafting cupboard is a bit bare. I have been pretty much left with all my "ugly" stuff (especially papers with rather weird designs) as well as odds and ends of ribbon, and some embellishments I had not used up on the cards. What to do - what to do? I had vowed not to go out and splurge on stash until I had well and truly cleaned out the dregs.
Since I am making handmade gifts for all my friends this year - bath goodies for the girls, including a rather excellent handcream (recipe concocted by a very dear friend's late mum) and sweet makes for the guys - I needed packaging. And the easy peasy handmade gift bag was born!!
All you need to make this gift bag is some patterned paper (30.5cm x 25cm); a ruler, a punch, a pair of scissors, some ring reinforcements, glue, a bit of rafia, string or ribbon and some masking- or cellotape
 |
| Cut paper to measure 30.5cm x 25cm |
 |
| Make a fold of 1cm along one length (top of gift bag) |
 |
| Fold the length in half - make a 1cm fold along one side |
 |
| Fold on the half again |
 |
| Fold up the overlap |
 |
| Open out and cut the inside corners as shown |
 |
| Spread glue on the inside and fold over |
Fold the bag on the half and run your thumb over the fold over to secure.
 |
| Spread glue on the overlap - run thumb over to secure |
Turn the top end of the bag away from you.
 |
| Make a fold of 5cm at the bottom end of the gift bag |
 |
| Open the bottom end - push sides inward as shown |
Flatten the seams with the handle of the scissors to get a nice neat fold
 |
| Fold the flaps over to meet on the original fold |
 |
| Stick masking tape on the inside edge of one of the flaps |
 |
| Fold over and press down to secure |
 |
| Cover the fold with a piece of masking tape |
 |
| Cut a 5.5cm x 4cm rectangle |
Round the corners with a coin for a neat finish
 |
| Glue the rectangle over the masking tape |
 |
| Use a punch to make holes in the top of the bag |
 |
| Draw or trace an image to colour to decorate the gift bag |
You can even use a cut out from an old greeting card or wrapping paper -
if you don't want to brave the colouring in.
 |
| Colour with pencils or copic markers |
You could add a bit of gltter glue for accent.
Frame with a matching or contrasting colour (I used black)
 |
| Rafia handles |
Plait three strips of rafia to make two 20cm strips.
Tie a double knot in one end
 |
| Handle placement |
Thread the unknotted end from inside to outside first,
Now thread the unknotted end outside to inside.
Tie a double knot on the inside. Repeat on other side.
 |
Voila - you have a Gift Bag |
Put your hand inside the bag to "pop" out the bottom.
And there you have it - a one of a kind gift bag!!!!
See how creative you are!!


Very clever and easy too .... I love to make my own gift wrappings and boxes!
ReplyDelete