Zooty Owl's Crafty Blog

Colourful Crochet, Craft, Cooking, and Contemplations

Showing posts with label Papercraft. Show all posts

Sunday, 27 January 2013

"Secret Admirer - Icons" Cards

Sunday already and I finally (almost) finished making the cards with my complimentary stash.

Not the style of toppers I would normally use - so I had to challenge my creativity a bit, but without further ado, here they are:


Off to tidy my craft room a little as it looks as if a train hit it - maybe I will first take a swim and ....

Tuesday, 22 January 2013

Cupcakes

Haven't got started on my new cards yet..

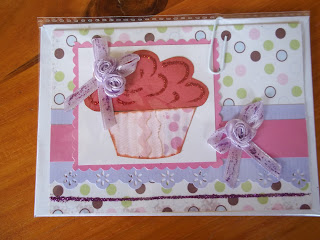
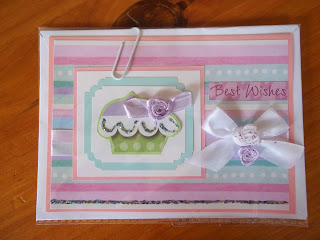
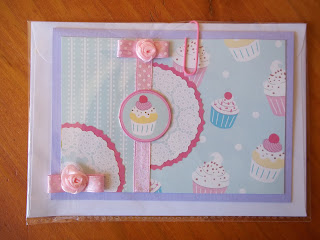
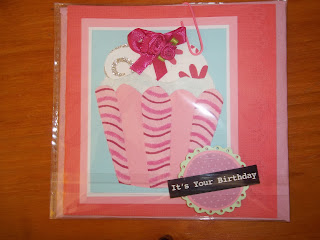
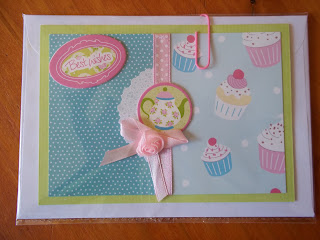
Cleaning up one of my memory cards last night I came across some photos of cupcake themed cards I had made ages ago:


Cupcake Themed Card

Cupcake Theme Card

Cupcake Theme Card

Cupcake Theme Card

Cupcake Theme Card


Cupcake Theme Card

Cupcake Theme Card

Cupcake Theme Card

Cupcake Theme Card

Cupcake Theme Card


Cupcake Theme Card

Cupcake Theme Card

Cupcake Theme Card

This made me feel like cupcakes - so I baked a batch for our tea later this morning (yum wish it was ten already!)!

Cupcakes

Now for a quick cuppa (I'm not going to have a cupcake with that) - and then to get started on those cards!

Sunday, 16 December 2012

Gift Bag - Extra Large

I have been crazy busy crafting away.    Have a couple of really big projects on the go!

Busy making a diagonal box stitch "gypsy blanket" from yarn scraps left over from 2012's projects.   Planning to do a lot of traveling next year - I always find myself with cold knees on planes, buses and trains - not to mention while riding shotgun (hubby likes to drive with the aircon on - even when it is a bit nippy!)   I crossed halfway with this project yesterday - so hoping to finish it by tomorrow.

My daughter, Dani, also loves to craft - she made a snuggly afghan for her boyfriend's mom.    Quite a task to wrap something like that.    I made a bag and tag using (almost a whole sheet) giftwrap.     Used the Woolies gift wrap as it is quite firm.    I was half asleep when calculating the dimensions and the bag turned out excessively "long".    So I decided to flip over the top part -  instead of inserting the handles I punched holes straight through and used the flap to make a "handle" and close the bag.   Dani made the stars and decorated the bag.

Gift Bag

Monday, 3 December 2012

Easter Bunny Cards

It's been raining cats and dogs here since yesterday afternoon - the sun peeked out between the clouds about ten minutes ago - but it is still heavily overcast.  Just the weather for a nice lamb stew and a baked pudding (supper sorted!!)

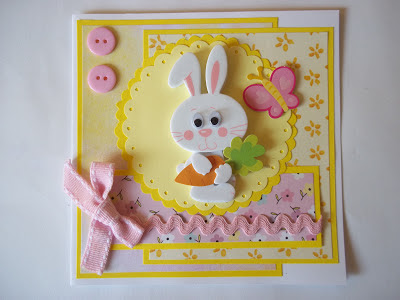
I had bought another sheet of the "Easter" foam and foil stickers from the Crazy Store - made a few quick cards using some leftovers I had on my table.

Vegetable Themed Card

Sweet Themed Card

I added some "googly eyes" to the bunnies.   You can find "googly eyes" at most haberdasheries - even the hardware hypers are stocking them lately (craft section).

Bunny Themed Card

I used some of my paper flowers to embellish the card above.   These are super easy to make.    I used a flower stencil to stencil small flower shapes onto strips of paper with a pencil.    Dip the paper into water and then crumple up.   Leave crumpled until almost dry.    Uncrumple and gently smooth out (don't iron these).   Cut out the flower shapes.   Pierce a hole in the middle of each one (a darning needle works quite well)   Layer up three shapes and secure with a brad.

Bunny Themed Card

Bunny Themed Card

Food starting to smell really yum.   Off to add the next lot of ingredients and then maybe get a bit more crafting done before supper!

Saturday, 1 December 2012

Crumpled Paper Flowers Tutorial

Have managed to craft myself into a corner (literally) surrounded by crumpled, distressed, stained and foxed paper - and heaps of paper flowers!

I have made a few of each of six different distressed paper flowers - but I am only going to share one with you for now:

Cut five of the same shape flower (longish petals work best for this bloom).    Layer the five shapes on top of one another with the petals lined up.    Put a staple through the middle of the five layers to secure the bloom.  Now take a knitting needle (or something similar - I have used one of my pewter tools) - start at the tip of the petal and roll it around the needle towards the middle of the flower.    Repeat this with each petal on each layer.  Glue a button over the staple.


As simple as that - and you can make it in a jiffy!

I have been looking for a basket or container of sorts to store some of my pens in (they need to be stored horizontally).   I was not about to drive to the packaging warehouse about 45kms away (a smorgasbord of all things plasticky and storagey) - seemed a waste of time and petrol for just one thing!   Went down to the local mall - little shop called the Crazy Store - they have everything from balloons to baskets, pegs to paper, etc.    Did not find what I was looking for but I did spot some "Easter" looking foam and foil stickers  for a couple of Rands - which I was absolutely compelled to buy!


And they work perfectly with my flowers!     Used the four lager stickers to make 12cm x 12cm cards.   Will use the two smaller ones to make gift tags (possibly).

Easter Egg Themed Card


Easter Card

Easter Card

Well that's enough crafting for me for one day.    Off to make a cuppa for hubby and myself  (which I am going to enjoy with a lovely biscuit or two .... maybe even three)!

Crumpled Paper

Saturday afternoon and the weather is rather miserable.    I made pizzas for lunch (enough to feed an army) - so yay there is enough for dinner too!!

My youngest is playing with her new camera - snapping away at me while I work - so if my typing seems a little off, its because I am flash blind!

I have been texturing and distressing papers this afternoon to use on various projects.    One of the easiest ways to add interest to ordinary paper is by crumpling it.    Wet it under running water and then crumple it up.    You can either leave it to dry and then un-crumple it (in which case the creases will be quite deep) or unfold it and let it dry, or unfold it and iron it dry.   Also try crumpling a darker colour with a lighter colour -  quite often the colour runs a bit and then you get quite a nice effect on the lighter colour.

Once the paper is dry you can distress it by lightly sanding over it with fine sandpaper or a kitchen scourer.    I always add this step if I want my project to have a vintage feel!

I had some neon orange and yellow which I crumpled  together and an odd purplish sheet which I crumpled with pink.    I don't have a use for these on my other projects so I am going to use them to make up a batch of paper flowers.

The tutorial on how to make the flowers can be found HERE.

Friday, 30 November 2012

Snowman Gift Tag

Still playing around with recycled bits in between making some bead jewellery.

Living in South Africa we will not see a single snowflake over Christmas (unless our weather turns even freakier) - but I have made a few snowflake and snowman cards anyway!

This one is super easy to make.    Cut two small circles (the lid of a large and medium glue stick work quite nicely!) from white card.    Cut a hat shape from black card (I have used darker kraft card) and a carrot shape - for the nose - from orange card.   Cut a wavy strip from turquoise card.  Tie a knot in a short piece of ribbon for the bowtie.

Layer up as shown, draw the snowman a face and stick arms, doodle some snowflakes and a border at the bottom of the tag to finish:

Snowman Gift Tag

Thursday, 29 November 2012

Gift Tags - Upcycled Materials

One of the things I love most about crafting is that one never runs out of materials that can be upcycled.    There is always something that can be salvaged from packaging, gift wrapping, floral arrangements, etc.
 
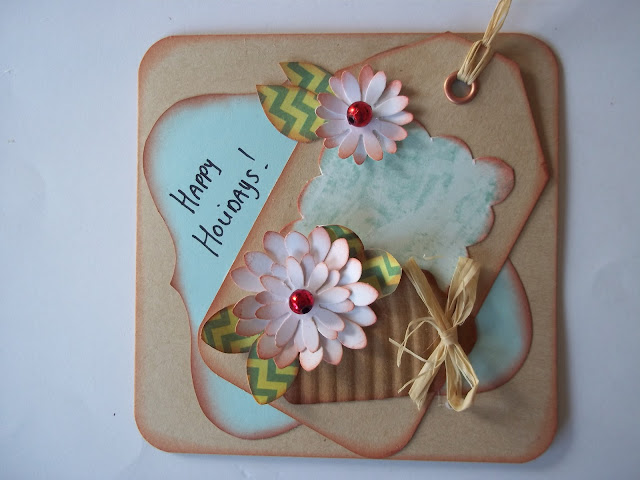
My hubby bought a few new shirts and they were folded around some very nice brown card.  My daughter was given a lovely arrangement of miniature sunflowers in a pretty cardboard box.   The ribbon handles were salvaged for the bow on the Christmas wreath I made for my mom.   I also salvaged the raffia tied around the box, and decided to use the cardboard and raffia to make some gift tags.    I punched some flowers in two different sizes, cut out two sizes of tags (one large and one much smaller) as well as as hearts and scalloped squares.   There were some punched buttons left over from a bulk make of Christmas cards.

Gift Tags
 
I layered all of these materials up and this is the result!

Gift Tags
gift tags

You could use the tag as is, or use it as a topper for a card.

Cut a 10cm x 20cm rectangle from the shirt packaging, fold this in half to make a 10cm x 10cm card blank.   Add another layer and some extra leaves and finish with a handwritten sentiment:

Recycled Packaging Cards

Cut a 14cm x 20cm rectangle from the shirt packaging.   Fold in half to form a 10cm x 14cm card blank.    Cut a 14cm x 12cm piece of gift wrap or any patterned paper.    Cover the card blank, overlapping 2cm over the fold.  Add a few more blooms and a handwritten sentiment.

Gift Tags

Happy upcycling!!

Christmas Cards & Wreath

I haven't had time to go shopping for stash yet, having too many non-papercraft projects on the go.   I did have to go to the supermarket to stock up, however - bought a few magazines too.    One of the mags came with a lovely freebie - a Christmassy paper pad and chipboard shapes.   I managed to get in a few quick makes between all the other crafting:

Christmas Cards

Inevitably I was left with a pile of scraps - used them to make a Christmas wreath for my mom.   I thought I had better make her one too, otherwise I would be in trouble with a "why didn't you make me one??"  My sister loves it, so I guess that means I will have to make her one too...

Christmas Wreath


Monday, 26 November 2012

Christmas Pudding Gift Bag and Card

Just a quick pic to show you how I have used the Christmas Pudding on a gift bag and a 12cm x 12cm card!

 .

Christmas Pudding Gift Tag


I finally got started on my Christmas Gift Tags

This Christmas Pudding tag is made using the same technique as for the Baubles.    In this case however you just use much smaller circles.   I have used Kraft card to make the pudding,  but any brown paper or a recycled paper bag will work just as well.


Cut five small circles.    Join as for the  Baubles, but do not close once you have added the last circle.   Cut three "holly" shaped leaves.     Arrange the leaves on your tag.    Glue the pudding down and add two red beads to finish.    If you do not have beads,  little red buttons or a few dots of red glitter glue would also do.

This little pudding can also be used to decorate your gift bags to match the tag.    I have even made one or two Christmas Cards using this topper.

This is such a quick make you could easily make a few while sipping a nice cuppa - which is exactly what I am going to do right now!!

Sunday, 25 November 2012

Paper Bauble Christmas Decorations

These paper baubles Christmas Decorations are extremely easy to make and a fun holiday project to get the kids involved with!

Paper Baubles

All you need is some colourful paper, paper rafia, three beads and whatever you have to decorate the paper baubles with.

Cut eight circles of the same size.  Fold each circle in half with the pattern or colour to the inside.  Glue one half of each circle to one half of another circle (making sure that the fold is nicely lined up) - this will form a spine.    Cut a piece of paper rafia about 30cm long, fold in half  and  hold against the spine so that 1/3  protrudes on either end.   Then glue the back half of the last circle to the front half of the first circle.

Paper Baubles

Push the top loop through a biggish bead.   Push the bottom ends through another biggish bead and then a smaller one - now tie together to pull the beads tight.    Cut 4 x 20cm pieces of raffia.   Tie these pieces down on top of the bottom bead.  Fold down and tie together with another piece of raffia about 1cm from the bead.   Knot and cut off.   Now decorate each of the panels as you like.

I have strung my paper baubles onto strands of plaited raffia, garden twine and kitchen string interspersed with beads.   I plan to use these  to decorate our lapa (outside thatch area) for the holiday season - I have bought a few strings of fairy lights which I am going to twist around some of the strands for a bit of Seasonal Sparkle!

Wednesday, 21 November 2012

Paper Flower Christmas Wreath

I fully intended to make gift tags yesterday afternoon - but it was so hot and I still felt very flu-ey, so I plopped myself down in the lapa with a stack of magazines and a tall icy lemonade.

One of the magazines had some lovely ideas for using up paper scraps.    In one of the designs they use tiny punched flowers and leaves to make a Paper Flower Christmas Wreath on a card - very pretty.    I am down to my final heap of scraps - but I figured I would have to make about forty cards if I used such a small design, and I wanted a quick "final" make.

I decided to "upsize" the idea!


I drew  around the lid of a big cake tin onto a piece of sturdy cardboard (a cereal box will work quite nicely), and then around the lid of a smaller cake tin placed centrally inside the big circle to for the base of the Christmas Wreath.   Cut out the ring and punch a single hole fairly close to the outside circle - make a loop using twisted paper ribbon.

I made as many flowers as I could using the same technique as for the Poinsettia decoration HERE.   I also made as many shapes and sizes of leaves as I could with whatever bits of green paper and board I had left.   I then started by glueing the flowers to the board as closely as possible without squashing them too much.   I then started filling the spaces with leaves and small bows made from paper ribbon.    I then added a bit of bling in the form of some shiny red beads and some pearl beads.   I added big paper ribbon as the final touch to my Paper Flower Christmas Wreath.